With 13.3” LCD, this lightweight laptop has the brain of i5-5200u, 4GBs RAM, 500GB Hard drive blah blah blah…
Just bought one yesterday from local store for AU$ 799 and it surprised me when it comes with 128GB SSD instead. Nice!
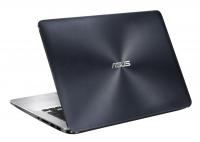
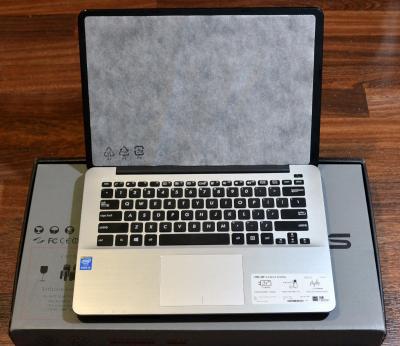
My first impression about this one is the lid. It is black brushed aluminium-ish (actually it is plastic) with pattern of the same centered circles look like what you see in some older UX model (which cost almost as twice as this one). The interior is featured with brushed aluminium but not underbelly and the bezel frame that hold the LCD.
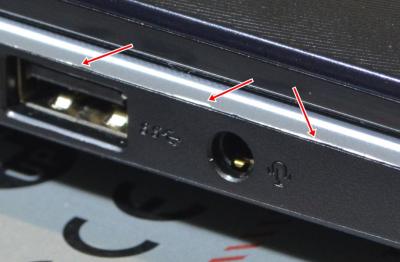
Anyway, this is a low cost version of the Ultrabook UX model and Zenbook model. So, some minor faulty on touching details are expected, like this left side at the headphone jack
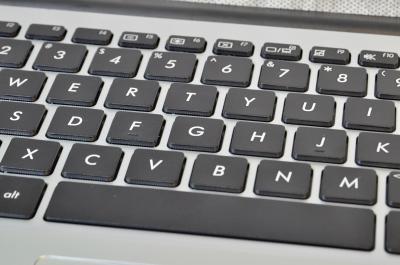
The keyboard is very comfortable compare to the old laptop I have. Only one thing I dislike is the up and down arrow keys are so close together that slow me down while pressing them. You know, I have a coding hoby, I spend some of my free time coding and I use these arrow keys a lot.
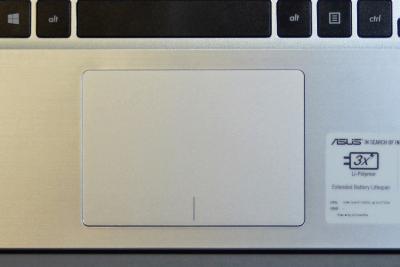
The big thing annoys me when I start up the laptop for the first time is the clicking noise of touchpad (trackpad). It was loose touchpad that made clicking noise when I tried to register a left click by tapping (even very gentle) in the middle of the touchpad. My first thought was I am gonna returning this laptop. But 15 minutes later, I decided to fix the problem myself since I figured it out what is going on and return it later if I couldn’t fix it.
Searched around the net and found out that some other people having the same problem with the trackpad with asus laptop in different model and their solution is return the laptop. Well, certainly asus is not doing really good job in quality checking before shipping the laptop.
So, The first thing I did with this laptop was… took the laptop apart and fixed the touchpad.
My intention at first before I bought this X302LA was to buy the one with 500GB hard drive and swap in my spare 128GB SSD I already had at hand in my old laptop. So I was going to disassembly the laptop anyway :D
If you are look for a way to upgrade the hard drive of this laptop Asus X302LA, you can use the little guide below
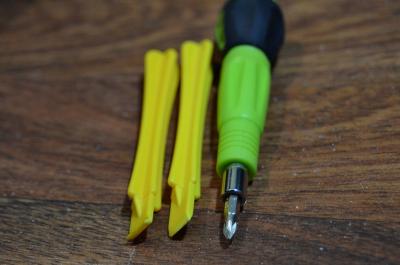
This is the tool I need. They are used to disassembly most of the phone and ipad these day.
You can use a credit card instead, but it harder this way.
HOW TO DISASSEMBLY ASUS X302LA
- STEP 1: TURN OFF COMPLETELY
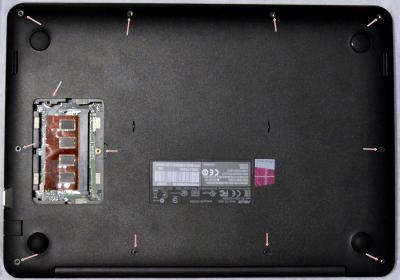
- STEP 2: unscrew all the screws at the bottom. Luckily there is no screw under the 4 ruber feet.
- STEP 3: Turn it over and open the lid
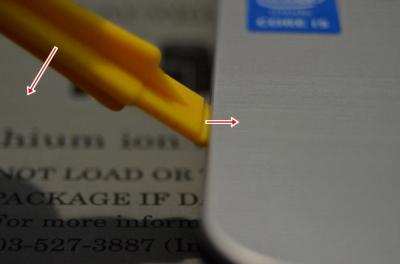
- STEP 4: Use the yellow tool to open the keyboard / touchpad part. Be gentle try not to force it open
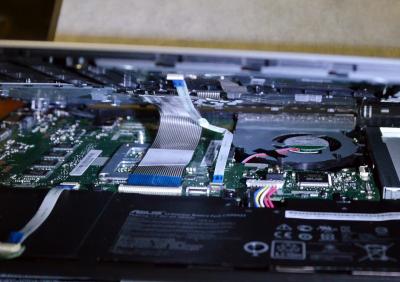
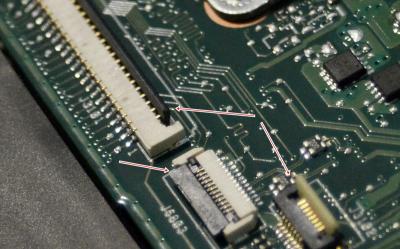
STEP 5: Disconnect 2 flex cables for keyboard and touchpad. Lift the latch up to loose the cable and push the latch down to fast the cable
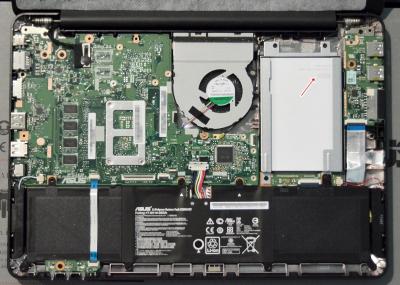
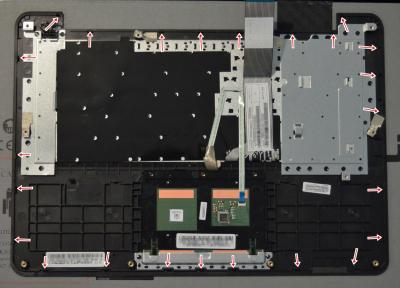
- STEP 6: Take the top part out and take picture of the inside :D
Spoiler alert: the Frame is made of plastic, only keyboard part is coated with thin layer of aluminium.
Okay, you can see the hard drive and you replace it easily if you can make it this far.
And the put it back together is simpler than take it apart.
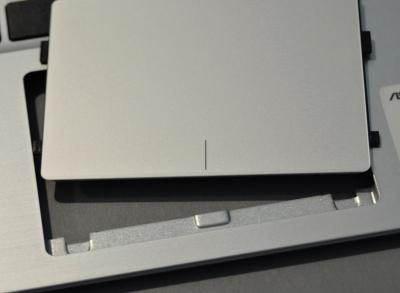
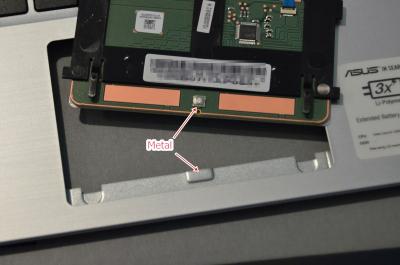
Here is the touchpad problem
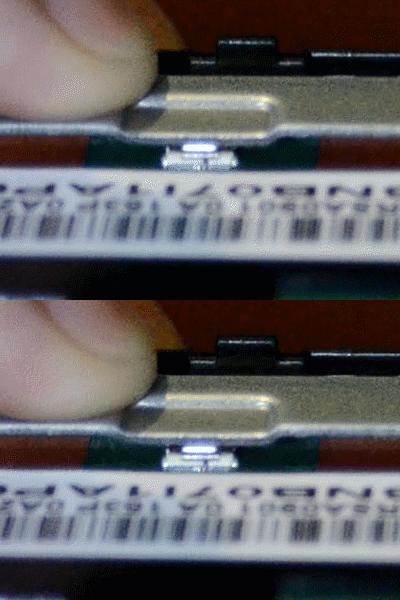
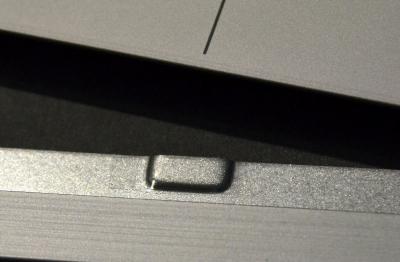
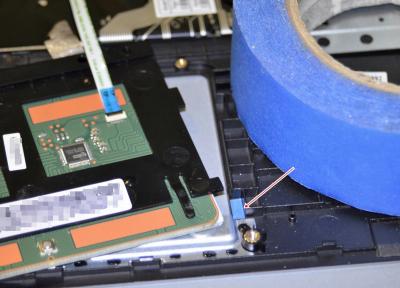
There is small gap, about 0.25mm between the push button (tactile button) and the frame. That is why when you tap the touchpad the tactile button hit the frame and make clicking noise. If you press the touchpad down a little bit more, this time it will make the click sound of this tactile button.
So, I put a clear sticky tape at the contact surface to make the click sound more soften but still have a smooth and even contact surface.
Also with masking tape (has rough surface) about 0.2mm to help push down the touchpad so that the push button actually touch the frame.
After checking carefully if the gap was still there, put everything back together. And then there was no more unwanted clicking sound
Oh, by the way, Windows 8.1 SUCKS big time. The second thing I did right after fixing the touchpad problem was upgrade the OS to windows 10.
Now I am happy.
Edit 9-9-2015:
Kinda mad on Asus Smart Gesture. It doesn’t allow to change the behavior of these gesture. Did Asus make it this way as marketing for new features ,say, to promote stuffs of windows 8.1 or windows 10 like cortana and side bar?
For windows 10, activate side bar using 4 fingers tap is OK to me, but rarely use it like once for a few weeks to turn on bluetooth or go to setting stuffs… Because for any other things else I can use hot key Fn+ F11, F12 for volume control, Fn+F5, F6 for brightness etc.
And cortana, using 3 fingers tap, it just looks like the search function of start menu in windows 7 to me, but a lot crappier. Beside that, I can press the win logo button to activate start menu and type something that would archive the same thing. I wouldn’t rely on cortana to find everything for me. I prefer open explorer to find my stuffs since I always know where to look for stuffs in my computer. So, I could use this once a week maybe.
But for middle mouse button to open new tab in chrome, which asus smart gesture doesn’t support, I press it a lot, even more times than I press right mouse click to open context menu. I could click the middle mouse button like 100 times a day, or even 1000 times a day, to rotate the part around in 3D mode in solidworks.
I have no other choice than to carry an wireless mouse which provides MIDDLE frigging MOUSE BUTTON that Asus smart gesture fails to do.
ASUS, please drop the word SMART off the name, just name it Asus gesture instead. Smart would mean to be able to do things flexible for some unexpected circumstance out of ordinary.
To be honest, if it is hardware limitation I have no problem accept it. This is about software which can be fix easily if Asus want to. But it seem Asus is too busy copying Apple to update some software for some stupid users like me!
And so, I decided to fix it myself
[tag]ASUS X302LA trackpad clicking noise[/tag]


Saturday, October 10, 2015 at 19:05:08
Great! I have a similar one, with i3 CPU and HDD, and I’m thinking about swapping the HDD out and installing an 128GB SSD, maybe another 4GB of DDR3 RAM. The SSD is quite small, but the HDD is slow and very “green”, since it parks its head often, make clicking noises and have a slow access time.
My question is, since I’m not really a DIY guy, can I install that SSD myself without breaking something? That cables look thin and fragile, I don’t want to lose the warranty by opening it, so I guess no marks should be left there. Also, you didn’t put a clear picture of the RAM slot, is there a 4GB RAM module soldered on the board, and another slot available for upgrade - that small opening from STEP 2?
Thanks Ceez!
at 21:30:41
128G SSD is good enough for work and study, but not for movie storage :)
Yep, 4g soldered onboard and one free slot available for upgrade. I upgraded mine with a 4g stick 2 weeks ago. Anyway, it does not work with DDR3 but only DDR3L (low voltage). I tried with 4g DDR3 stick from another laptop and failed.
The flex cable is nothing to worry if you are prepared and do everything slowly.
Un-snap the top part (with keyboard + touchpad) is the hardest step and you might break a joint if you are not careful enough. These joints hold the laptop tight together even when all the screws at the under belly are taken out. It confused me at first if I still missed a screw or two. Most laptops I used before don’t have too many snap in joints like this one.
The snap in joint looks like the joints in this abs project box
http://files.ceezblog.info/x302l-IMAG1331.jpg
http://files.ceezblog.info/x302l-IMAG1332.jpg
I updated picture in step 5 and 6 with texts that show where are the snap in joints.
You can start at the spot near the usb or card reader, which has weaker structure than other spot. I use finger nail to make a small gap then stick the yellow tool to the gap and pry open using the tool as a lever. Then move the tool and pry the next joint and all the way arround until the last joints and it just come off. After that, just becareful with the flex cables and you are OK.
Monday, October 12, 2015 at 01:13:00
I understand. It looks pretty easy if done with enough care and not fast.
Well, now I’ll wait to buy some tools to open it, and of course, the SSD. Thank you for the information!
Cheers!
Monday, October 19, 2015 at 03:21:39
Hi Ceez,
Thank you for the super guide! I have a question, since it’s not visible in your photos, how difficult do you think it would be to replace the wireless card? The one in the laptop drives me nuts with the slow speed (it is only 1×1) and low signal (I never get full bars in linux even at 3m from the router..)
Thank you!
Tuesday, October 20, 2015 at 19:45:12
Hi there,
I think it would be easy. I didn’t notice a wireless module when I fixed the touchpad. It must be in the other side of mother board (same side as the RAM slot). Unfortunately, I deleted the high-res of these pictures already.
But judge on the picture of STEP 6, I can see the black wire to the antenna right below the CPU fan, it goes all the way to the hinge. I can see the shadow on the gold-plated pad with a centered hole next to that black wire, that means there is a notch on the mother board right below the CPU fan and it reveals the connector to the antenna of the underneath wireless module.
So, you have to take the motherboard out in order to reach the wireless module.
As I said to Steve, the hard part is pry open the snap in joints, because you don’t see what is the joints look like. That makes it hard to open and easy to break if you don’t have proper tools. Other than that, un-screw the screws is quite easy don’t you think?
Monday, October 26, 2015 at 16:14:47
Thank you! You are right, I opened some laptops and phones and those joints are the worst to deal with! If you are hurrying it’s guaranteed some will break. That is the scary part that stops me from doing it. Also, I do have some intel WiFi cards, but those only come with WiFi and no BT. The part in the laptop has BT included, so if I switch with the ones I have, I won’t have BT anymore. So I’m kind of hesitant at the moment whether to do it or not :) Thanks again!
Tuesday, January 19, 2016 at 23:58:50
Hi !
This a great work ;)
Just a question, it’s posible install an SSD + HDD ? there is a space for msata ?
Thanks
Friday, July 1, 2016 at 08:57:33
Hello there. Excellent article, I have been looking all over the Internet for a tutorial like this. I have a K501UX with the same problem. However, I am a little afraid of trying to do it by myself… Could you possibly detail a little bit more the way in which you removed the trackpad from the chassis (unscrewed, removed tape, etc)? If it were with pictures it would be awesome but with a written explanation I believe I would feel much confident.
Thanks!
at 19:18:08
I assume you know how to take apart the upper part (step 6 pic-2) and the lower part (step 6 pic-1), yeah? Then it is very easy to remove the touchpad.
Look at the step 6 pic-2, the red arrows indicate where snap joints are. Take a closer look at the touchpad section, you will see 3 screw holes which screws removed and a piece of conducting tape peeled off the touchpad. Simple as that is. Undo the screws, peel off conducting tape, disconnect flex cable and the touch pad will come off.
Tuesday, September 6, 2016 at 17:27:33
I’m having the same issue am going to fix it similar to your methord. Regarding gestures there’s a small program called multiswipe which does just that and more! I’ve started using it and am very happy with it.
Saturday, September 10, 2016 at 22:05:33
Very nice just tried this on my asus and it made one side better but no difference to the other. Can you explain what you doing in detail with the blue tape? I didn’t quite understand that part. Thanks
at 23:08:03
Blue tape just a little bit thicker but softer than clear tap. The point is you just fill the gap between the button and the metal frame at the contact point, which is about 0.2 mm in my case. You can use whatever you have to fill the gap, paper, conduct tape, even double side sticky tape. Good luck